
Testing Philosophy in Kotlin: Expect/Actual, Unit Tests, Kotest, Junit and the Nature of Test Doubles
A deep dive into the philosophical foundation of testing in Kotlin: the meaning behind expect/actual, differences between Unit and JUnit tests, and the conceptual roles of mocks, stubs, fakes, and spies. Understanding tests not as scripts, but as controlled simulations of reality.
1. Introduction: Why Tests Are Not Verification, But a Model
This article opens the series “Android Under the Hood: Testing Without Illusions”. Seven parts - seven deep dives, from foundation to system architecture, from syntax to ethics. Before you is the first: the philosophical foundation. It’s needed so that all other articles don’t hang in the air.
If you’ve been testing for a long time - this is a reminder of why you do it. If you’re just starting - this is the foundation without which everything else turns into mechanical repetition of patterns from tutorials and “Best Practices”.
Tests are often presented as a verification mechanism: supposedly, there’s code, and you need to check if it works correctly. But software is not a device. We don’t have sensors with which we can measure correctness. We only have behavioral models. And tests are not verification, but the implementation of these models in the form of executable code.
When we write a test, we create a second universe, that is, a virtual user. It’s similar to the real one, but more controllable. In it, time stands still, dependencies do only what we allow them to, and the system itself behaves predictably. This is not a copy of production - it’s its reconstruction. Moreover: it’s a reconstruction based not on facts, but on intentions. We test not how the system works - but how we want it to work.
That’s why tests rarely die from bugs. They die from changing expectations. The contract changes - the test fails, common practice isn’t it?). Not because the code became worse. But because the mirror we were looking into no longer matches the shape of the original.
A test is an artifact of trust. It fixes the boundaries of the permissible that we agreed to consider true. Each assertEquals(expected, actual) is not a fact, it’s an act of assertion. It says: we agree that if actual == expected, then everything is good. This is an agreement. This is a contract.
Kotlin is well-suited for testing because it provides the same tools as for main code: lambdas, DSL, extensions, coroutines, strict typing. Kotlin tests don’t feel like a separate language - they’re written with the same means, in the same paradigm. There’s no feeling of “test is second league”. Thanks to compact syntax, readability, and the absence of excess boilerplate code, a test looks like part of the architecture, not like a superstructure over it.
Throughout the series, examples will be in Kotlin - not because “it’s trendy”, but because it’s the standard of Android development and a full-fledged language for production, regardless of platform. Kotlin is already used in Spring, Ktor, Compose, KMP - and everywhere it’s equally good for tests.
2. Basis: Testing Lexicon
Before diving into the mechanics and architecture of tests, we need to fix the basic vocabulary. Without it, any reasoning is like trying to build architecture without the concepts of “wall”, “connection” and “support”. Below is not a complete glossary, but exactly that minimum on which the entire series will rely.
Assertion
Assertion is a programmatic statement expressing an expectation. If it’s not fulfilled - the test is considered unsuccessful. In most frameworks, assertion is implemented as a function that throws an exception when there’s a discrepancy:
assertEquals(expected, actual)
assertTrue(user.isLoggedIn)
It’s important to understand: assertion doesn’t describe behavior - it fixes it. This is the final point of the scenario, where the test explicitly states: here’s what I consider acceptable. Everything else is just preparation for this moment.
Test Case
Test Case is a single testing scenario. It consists of three phases: context preparation (arrange), action execution (act), and result verification (assert). In Kotlin, this is usually a function with the @Test annotation.
@Test
fun loginFailsWithInvalidPassword() {
  val auth = AuthService(FakeUserRepo())
  val result = auth.login("admin", "wrong")
  assertFalse(result.success)
}
Test Case should be isolated and reproducible. If a test depends on the state of the external environment - it quickly loses its reliability.
Test Suite
Test Suite is a logical group of tests united by some criterion: module, architecture layer, business functionality. Usually it’s a class, file, or DSL structure. The purpose of a suite is to collect related cases and run them together, for example, during CI build or load testing.
A well-organized suite is not just a folder with tests. It’s a coverage map. It shows where there are tests, and where there’s only hope for developers’ intuition.
Test Runner
Test Runner is a mechanism responsible for discovering and executing tests. It provides the infrastructure cycle: initialization, execution, reporting. In JUnit 5, the runner is divided into modules: Platform, Jupiter, and Vintage. Kotlin tests in JVM projects are most often run through Gradle (or IDE build system), where the runner is integrated into the pipeline.
A good runner is not noticed. A bad one breaks your debugging, caches outdated states, or ignores failures.
Test Double
Test Double is a substitute object that replaces a real dependency in a test. This is needed so as not to call a real database, not to send real emails, and not to wait for network responses. With such objects, the test becomes isolated and manageable.
There are several types of Test Doubles - and each of them solves its own task.
Stub is used when it’s important to just return a fixed response. It doesn’t remember what was asked of it, and isn’t interested in why. Its task is to be a stable background. For example, when you need to always return the current date or query result.
Mock is used when it’s important not only what was returned, but also how this object was interacted with. How many times a method was called, with what parameters, in what order. Mock is needed where behavior depends on side effects: notifications, logs, external calls.
Fake is a working but simplified version of the real implementation. For example, a fake database that stores data in memory, not on disk. Unlike stubs and mocks, a fake can “live” - accumulate state, behave like a real system, but without all the heaviness.
Spy is similar to mock, but instead of imitation, it actually performs actions like a real object. At the same time, it records what and when was called. Spy is needed when behavior is important to preserve, but it’s also necessary to check interaction.
Dummy is the simplest and most seemingly useless Test Double at first glance. It does nothing, returns nothing, and doesn’t affect test behavior in any way. Its task is simply to be. Dummy is needed in cases where a method requires a mandatory parameter, but in the test this parameter plays no role. For example, when you need to pass a logger object or callback, but the log itself is not important. This is a form of syntactic noise that we consciously silence.
Test Double is a technique that allows testing complex systems in parts, without running the entire environment. And if code doesn’t lend itself to testing with such objects - the problem is usually not in the tests, but in the architecture.
Types of Tests
Software testing is not limited to a single concept of “test.” Quality assurance systems are built in layers, with each layer responsible for its own area: minimal code units, module interactions, complete workflow scenarios, and user interface.
In practice, four fundamental types are distinguished: Unit tests, Integration tests, End-to-End tests, and UI tests. These levels form the foundation of the so-called testing pyramid. The lower the level, the faster and cheaper the tests, but the narrower their coverage. The higher the level, the more expensive execution becomes, but the closer to real system behavior.
Subtypes are layered on top of these levels, such as Regression testing, Smoke testing, Property-based testing, Mutation testing, Accessibility testing. They do not form separate levels but clarify the purpose of verification: change stability, load performance, contract compliance, visual display correctness.
This division allows for building balance: most tests should be located at lower levels for speed and coverage, while upper levels should capture critical user scenarios and visual quality.
Unit tests
Unit tests represent the foundation of any testing process. Their task is simple in formulation and complex in implementation: to ensure that each minimal unit of the program (function, method, or class) performs its duties correctly and predictably. It’s important to clarify the term: the word “unit” here refers to an independent unit of code, not a build module or library. If you imagine the system as a building, unit tests check the strength of each brick before they are combined into walls and floors.
Technically, unit tests should be executed in complete isolation. This means no dependencies on network, database, or file system. Everything that can slow down or make a test unstable is externalized through substitutions (mocks, fakes, stubs). Such isolation provides high speed feedback: a well-built unit test suite executes in seconds, even when dealing with hundreds of checks, making them indispensable in daily development cycles.
At this level, tests are as close as possible to the source code. Property-based approaches and boundary condition tests are particularly valued here. A simple check “3 + 4 = 7” is useful, but doesn’t give confidence that the addition method always works. It’s much more effective to define a universal property, for example “addition is commutative, meaning a + b always equals b + a,” and run it on random input data.
Example of a compact unit test for a calculator:
class Calculator {
    fun sum(a: Int, b: Int): Int = a + b
}

class CalculatorTest {
    @Test
    fun sum_twoNumbers_returnsCorrectResult() {
        val calc = Calculator()
        assertEquals(7, calc.sum(3, 4))
    }
}
Such a test demonstrates the principle of isolation and quick verification. In real practice, the suite is expanded with checks for null, negative values, large numbers, as well as properties like commutativity and associativity for detecting hidden defects.
Subtypes that are particularly characteristic of this level:
- Property-based testing allows formulating universal function properties and automatically verifying them on a wide spectrum of random input data, which helps discover hidden edge cases.
- Boundary testing concentrates on testing extreme values, empty collections, null pointers, and other abnormal input data that often become sources of production errors.
- Mutation testing represents a method for checking the quality of tests themselves by artificially introducing errors into source code and controlling whether existing tests actually detect these intentionally created defects.
The goal of unit tests is to ensure the reliability of basic logic so that higher levels of testing can concentrate on interactions and user scenarios.
Integration tests
Integration tests verify how different parts of the system work together. If unit tests guarantee the correctness of individual bricks, integration tests capture the quality of joints between them. This can be service interaction with a database, repository with API, or module with external library.
The key feature of integration tests is the absence of complete isolation. Here participation of file system, database, or even network requests (more often in a controlled environment) is acceptable. The main rule is not to go to the scale of the entire system, but to limit verification to specific interaction. Such tests execute longer than unit tests, but provide confidence that components are correctly connected.
data class User(val name: String)

class UserRepository(private val db: Database) {
    fun find(name: String): User? = db.query(name)
}

@Test
fun repository_returnsUserFromDatabase() {
    val db = InMemoryDatabase()
    db.insert(User("osman"))
    val repo = UserRepository(db)

    val result = repo.find("osman")
    assertEquals("osman", result?.name)
}
Here we don’t test the internal logic of the find method and don’t check the database as a separate product. The goal is to make sure: the repository and database really understand each other.
It’s worth emphasizing that the boundary between unit and integration tests is not rigid. A unit test completely controls the environment: all external dependencies are replaced with substitute objects (test doubles), state is stable, there are no external effects. An integration test allows real dependencies: database, file system, network. There exists a scale between them. For example, using a real UUID generator or system time formally removes a test from the unit category, but this may be an acceptable compromise. The criterion here is not the size of the function being checked or execution speed, but precisely the level of isolation: the more dependencies are controlled, the closer the test is to unit; the more real components are involved, the closer it is to integration.
Subtypes often attributed to integration tests:
- Contract testing ensures verification that various services communicate according to a strictly agreed contract, including data formats, API structure, and expected responses, which is especially important in microservice architecture.
- Compatibility testing verifies module functionality with different versions of dependencies, operating systems, or external services, helping identify compatibility issues before production release.
- Integration with in-memory DB represents a compromise approach that accelerates test execution by using lightweight in-memory database implementations instead of full servers while preserving storage interaction logic.
End-to-End tests
The term End-to-End literally translates as “from end to end” and means traversing the complete path from initial user action to final result in the system. Such a test is not limited to checking one function or even a pair of modules: it runs a scenario through the entire stack, including interface, business logic, database, and external services.
The main difference from integration tests is that here the specific interaction of modules is not checked, but the entire user scenario as a whole. This is precisely imitation of real work: user authenticates, selects product, places order, system saves it in database and returns confirmation.
Example:
@Test
fun user_canLoginAndCheckout() {
    launchApp()
    login("demo", "password")
    addProductToCart("Laptop")
    checkout()
    assertOrderHistoryContains("Laptop")
}
Such a test covers the entire cycle: interface for login and product selection, cart business logic, storage or API operation, and final state verification.
End-to-End testing subtypes:
- Regression testing represents repeated verification of previously working user scenarios after code changes to ensure that new features haven’t broken existing functionality.
- Smoke testing includes a minimal set of critically important tests that quickly confirm the system starts correctly and performs basic business functions without deep detail.
- Sanity testing focuses on targeted verification of specific changes, new features, or bug fixes, providing quick confirmation that implemented changes work as expected.
UI tests
UI tests verify the correctness of user interface operation: element display, texts, navigation, action responses. If an End-to-End test captures the entire usage scenario as a whole, a UI test concentrates at the screen level. It’s important not only that the user can execute a scenario, but also that the interface responds predictably and doesn’t distort the experience.
The term UI test (User Interface test) means that the entry point is precisely interaction with visual elements: buttons, forms, lists, navigation. Such a test can run on a real device or in an emulator and simulate user actions.
Example:
@Test
fun buttonClick_changesText() {
    onView(withId(R.id.button)).perform(click())
    onView(withId(R.id.button)).check(matches(withText("Clicked!")))
}
Here it’s verified that the button exists, can be clicked, and changes text after pressing. Such a test touches the entire stack from screen display to event handler call, but the goal remains narrow: to ensure that the user interface works as intended.
Subtypes often attributed to UI testing:
- Visual regression testing provides automated comparison of current user interface state with reference version screenshots, allowing quick detection of unwanted changes in visual design or layout.
- Accessibility testing verifies interface accessibility for people with disabilities, including correct operation with screen reading programs, sufficient text contrast, presence of alternative texts for images, and keyboard navigation.
- Cross-browser / cross-device testing guarantees consistent user interface operation across different browsers, operating systems, screen sizes, and device types, identifying platform-specific display issues.
Testing Pyramid
After we’ve analyzed four fundamental levels of testing (Unit, Integration, End-to-End, and UI), a logical question arises: how to distribute efforts between them? Can we simply write a little of each type of test and consider the system covered? Here the concept of “testing pyramid” appears.
Test Pyramid
Test Pyramid represents a model proposed by Mike Cohn that illustrates the balance between different test levels. The pyramid base is occupied by Unit tests: there should be many of them, they are fast, isolated, and provide instant feedback. Above are Integration tests: there are fewer of them, they are slower, but confirm that modules really work together. Even higher are End-to-End tests and UI tests: the most expensive, resource-intensive, and unstable, so their share should be minimal, limited to critically important scenarios.
The pyramid idea is simple: the higher the test level, the more expensive and complex it is to maintain, and the fewer there should be in the suite.
Test Trophy
An opposing viewpoint is represented by the Test Trophy concept, proposed by Kent Siebert (creator of Testing Library for JavaScript). He argues that the pyramid is too conservative: in real projects, Integration tests come to the forefront because they verify connections between modules, not just isolated logic.
The “trophy” shape reflects this shift:
- The base remains with Unit tests, but there are fewer of them than in the classic pyramid.
- The main mass falls on Integration tests.
- End-to-End and UI tests are still at the top, but in limited quantity.
The argument in favor of the trophy is that excessive number of unit tests often leads to checking implementation details instead of behavior. At the same time, integration tests better capture real system usage.
Test Pyramid vs Test Trophy
In practice, neither model is absolute. The pyramid emphasizes the importance of cheap and fast unit tests, while the trophy accentuates the value of integration checks. The optimal approach depends on the project:
- for libraries and SDKs where mathematical precision and algorithm reliability are critical, the pyramid model is closer;
- for user applications and web services where component connection and layer interaction are important, it’s more useful to focus on the trophy.
Testing Principles
When we discuss pyramid or trophy, we’re talking about how many tests should be at each level. But distribution represents only part of the picture. A test can exist at the right level and still not provide confidence. The reason is that not only the form of the test suite matters, but also the quality of each test.
For a test to be beneficial, it must follow a set of principles: isolation, determinism, repeatability, and independence. These principles are universal and equally applicable to unit tests, integration tests, and end-to-end checks.
Isolation means that the test completely controls its environment and doesn’t rely on uncontrolled external factors. Database, network calls, file system, global application state should be either under complete test control or replaced with predictable test doubles. Otherwise, the test result will depend not on code quality, but on random environmental factors.
Determinism guarantees that the same test with unchanged code will always give identical results. If a test sometimes passes and sometimes fails without any changes in business logic, this undermines trust in the entire testing system. To ensure determinism, it’s necessary to eliminate sources of randomness, fix time values, and ensure input data reproducibility.
Repeatability allows running a test any number of times in various environments: locally at the developer’s machine, on CI server, in staging environment, or in cloud infrastructure, with the result always remaining the same. This is critically important for continuous integration systems where the same set of checks must reliably trigger hundreds of times a day.
Independence ensures complete isolation of tests from each other: each test independently prepares necessary data and completely cleans up the test environment after itself. If the correctness of one test execution depends on successful execution of another test, the entire system becomes fragile and unpredictable: failure of one method can cause a cascade of errors in remaining tests.
3. Concept: What Are We Actually Testing?
If we simplify to the limit, a test is running part of the system in a controlled context. It doesn’t prove that the system works correctly. It confirms that under given conditions it behaves in a certain way. We don’t test “truth”. We test behavior in a simulated environment.
Simulation, Not Proof
A common mistake is to think that having tests means system correctness. This is not so. A test is not formal proof, but a limited model. It covers a specific scenario, with given inputs and expected outputs.
If the system’s behavior has changed, but tests still pass - this doesn’t mean the behavior is correct. This means the test doesn’t know about it.
For example: previously isPremiumUser returned true if the user had an active subscription. Then they added a grace period, and now true is returned in the first 7 days for free too. The logic changed, but the tests remained the same - and continue to pass. Only now they confirm completely different things than before. They just don’t know that the meaning of true has changed.
A test checks not the entire system, but a specific slice: function, module, call chain. It fixes what was considered “acceptable” at the time of writing. If business logic, interface, or requirements change later - the test becomes outdated. This is not a bug, this is a property of the test as a tool.
Controlled Environment
A real system works in conditions that are impossible to reproduce 100%: network delay fluctuations, external API state, time, threads, races, caches. A test, however, creates a controlled environment where all behavior is known in advance and managed manually: from stubs and fakes to fictitious time and UUID.
The difference is fundamental. In production, errors can be random. In tests, they are either deterministic or not detected at all. Therefore, a test can never guarantee “everything works”. It can only say: under these conditions - yes.
Level of Trust
Each test gives the developer a certain level of confidence. But it’s important to understand where exactly this confidence comes from. Unit tests give quick feedback: they run instantly, failures are easily localized, they work stably. But they only cover local logic - isolated from the rest of the system. Their reliability is based on the fact that the environment is substituted, and behavior is strictly controlled.
Integration tests cover more connections. They check how components work together: controller, service, database, cache, queue. They are closer to reality, but require more infrastructure, are more complex to run, and their failures are harder to debug. Nevertheless, they are the ones that catch those errors that unit testing will never notice.
This is always a compromise. Between speed and completeness. Between convenience and accuracy. Between response time and signal depth. And until these compromises are realized - no coverage number makes sense. “100% coverage” can mean both reliable protection and empty ritual - it all depends on what exactly you covered, and why.
What We Actually Test
In practice, when we write a test, we don’t “check the entire module” - we check specific behavior in a specific situation. For example:that with certain input data, a method calls another component with the right parameter. Or that the system returns the expected result. Or that in case of error, a fallback happens, not a crash. Or that state is preserved during screen transition.
This is not “absolute system verification”. This is a fragment of behavior, checked in a specially assembled environment - with stubs, fakes, and complete context simulation. We manually assemble this model and assert: here in such conditions the system should behave like this.
The closer this context is to production - the more valuable the test. The further - the faster, cheaper, and simpler it is, but more local in meaning. And there’s nothing wrong with that. The main thing is to understand what exactly we’re testing, and why.
A test is not a way to prove that everything works. It’s a way to make sure that under given conditions nothing is broken. And if the conditions are chosen correctly - this is already enough for the test to do its job honestly.
4. Expect / Actual: Words That Say Everything
Almost every test has the same scene: we compare what happened with what we expected. Most often - through assertEquals(expected, actual), assertTrue(condition), assertFailsWith<SomeException>() or their analogues. And it seems like everything is obvious: we check that the result matches the expectation. But even in these simple calls, there’s a non-obvious moment.
Not Just Comparison, But Assertion
When we call assertEquals(expected, actual), we’re not just comparing two values. We’re making an assertion. We’re saying: if actual doesn’t match expected - it means the contract is violated. This is not a comparison operation, this is a test for agreement with our model.
It’s important to understand: assert* is not debugging. Not research. This is a declaration. The test is either passed or not. There’s no “almost”, no “warning”. And if the condition is not met - it’s not that the system broke, but our expectations didn’t match reality.
Expected/Actual - Order That Matters
Almost all assert functions follow the same order: first expected, then actual. And this is not an accident. This reflects the position: “we think that this is correct, and now let’s check if it matches what came out”. In this sense, actual is primary. It’s the result. It’s reality. And expected is our hypothesis.
If you mix them up, the test will still work. But the meaning of the statement becomes implicit. Readability drops. And, most importantly, the sense of what exactly went wrong disappears: whether we made a mistake in the model, or the code violated the contract.
assertTrue / assertFalse - Primitive, But With the Same Logic
The assertTrue and assertFalse functions don’t use expected/actual explicitly, but the logic is the same: you pass a condition that you consider acceptable. If it’s false - the test is not passed. It means something went wrong in the code, in the contract, or in our ideas about correctness.
Essentially, each assert* is a binary filter: either yes or no. This is a tool for fixing tolerances, not for finding errors. And the clearer we realize this - the more accurately we write tests.
Kotlin Native Keywords? Not About That
Yes, Kotlin Native really has expect and actual keywords. They are used in the multiplatform mechanism: expect sets the interface, actual - the implementation for a specific platform. This can be confusing - especially for beginners. But in the context of testing, we’re talking about something completely different. Here expected and actual are an agreement at the thinking level, not syntax. This is the structure of judgment: “I expect X, and see Y - did they match?”
If you perceive a test as an act of verification - expected and actual are no more than parameters. But if you understand that a test is an artifact of agreement, then expected is our manifesto. And actual is a reflection of reality. And when they don’t match, the question is not about an error, but about a discrepancy between what the system does and what we wanted from it.
Writing a test means formalizing expectations. And assertEquals(expected, actual) is not just a function call. This is a phrase. It asserts something. And if you read it exactly as an assertion - the structure begins to play a role.
5. Nature of Test Doubles: Mocks, Stubs, Fakes, Spies, Dummy

When we talk about Test Double, we mean objects that replace real dependencies in a test. They allow running code in isolation, without access to database, network, time, or other external effects. This makes tests controllable. But it’s important to understand that Double is not just a “stub”. It’s a model. And the choice of model affects what exactly we test.
There are four main types of Test Double, and each has its own purpose.
Stub is the simplest test double. It always returns predefined values and doesn’t react to input data in any way. Stub doesn’t check what was passed to it, doesn’t log calls, and doesn’t participate in business logic - it just stabilizes dependency behavior. Used when dependency is needed “for show”: it’s enough to return the needed value for the test to continue. Stub is background, not part of the scene. For example, in a user service test, you can create a repository stub that always returns the same user, ignoring the requested ID:
interface UserRepository {
  fun findById(id: String): User
}

class UserRepositoryStub : UserRepository {
  override fun findById(id: String): User {
    // Deliberately ignore id - Stub always returns the same thing
    return User(id = "stub-id", name = "John Doe")
  }
}

// Usage in test
val stubRepo = UserRepositoryStub()
val service = UserService(stubRepo)
val user = service.getUser("123")
check(user.name == "John Doe")
In the example above, Stub behavior manifests in that
UserRepositoryStubalways returns the same result (John Doe), regardless of the input parameterid. It doesn’t analyze what was passed to it, and serves only to stabilize the environment.
Mock is an object that records how it was interacted with. It remembers what methods were called, with what parameters, and how many times. The task of a mock object is not to return data, but to confirm that the code performed certain actions. Mock is used where it’s important to check how the interaction happened: was the logger called, did an email go out, was a callback invoked. This is an observer object with which the test checks behavior. For example, you can create a fake logger that will save recorded messages instead of real output, and then make sure in the test that the needed method was called with expected parameters:
interface Logger {
  fun log(message: String)
}

class LoggerMock : Logger {
  val receivedMessages = mutableListOf<String>()

  override fun log(message: String) {
    receivedMessages.add(message)
  }
}

// Usage
val logger = LoggerMock()
val service = UserService(logger = logger)
service.createUser("Alice")
check(logger.receivedMessages.size == 1)
check(logger.receivedMessages.first() == "User created")
In the example above, Mock behavior manifests in that
LoggerMockremembers all calls to thelogmethod. In the test, we check that the message was actually recorded. This is the essence of mock - not behavior, but interaction verification.
Mock is often implemented using libraries like Mockito or MockK, but here it’s shown manually to understand the essence of the concept.
Fake is a working fake. This is not imitation of individual calls, but a full-fledged, but simplified implementation of dependency. For example, an in-memory database or fake API that stores data in memory. Fake doesn’t just “pretend” - it really behaves like a real system, only without using real resources. It’s used when you need real interaction logic, but not heavy infrastructure. For example, instead of accessing a real database, you can use a fake repository that stores users in memory:
interface UserRepository {
  fun save(user: User)
  fun findById(id: String): User?
}

class FakeUserRepository : UserRepository {
  private val users = mutableMapOf<String, User>()

  override fun save(user: User) {
    users[user.id] = user
  }

  override fun findById(id: String): User? {
    return users[id]
  }
}

// Usage
val repo = FakeUserRepository()
repo.save(User("1", "Alice"))
val result = repo.findById("1")
check(result?.name == "Alice")
In the example above, Fake behavior manifests in that
FakeUserRepositoryactually saves and returns data, like a real repository, but without a real database. This is full-fledged logic - only in-memory.
Spy is a “double agent”. It wraps a real object but tracks what happened to it. Spy doesn’t substitute behavior (like mock) and doesn’t replace the entire implementation (like fake). Instead, it delegates calls to the real object and in parallel records accesses (for example, counts calls or saves parameters). This is a compromise between transparent behavior and the ability to analyze interaction. For example, you can wrap a real (or fake) repository in a Spy class that will delegate calls to the base object and count how many times the user search method was called:
class UserRepositorySpy(private val realRepo: UserRepository) : UserRepository {
  var findByIdCallCount = 0
  val capturedIds = mutableListOf<String>()

  override fun save(user: User) {
    realRepo.save(user)
  }

  override fun findById(id: String): User? {
    findByIdCallCount++
    capturedIds.add(id)
    return realRepo.findById(id)
  }
}

// Usage
val realRepo = FakeUserRepository()
realRepo.save(User("1", "Bob"))
val spy = UserRepositorySpy(realRepo)
val user = spy.findById("1")
check(user?.name == "Bob")
check(spy.findByIdCallCount == 1)
check(spy.capturedIds.contains("1"))
In the example above, Spy behavior manifests in that
UserRepositorySpydelegates calls torealRepo, but at the same time records:how many times thefindByIdmethod was called, what values were passed.
Spy is useful where behavior is important to preserve, but you also need to observe interactions. We see both “what was called” and “what actually happened”.
Dummy is a “silent extra”. It exists only because the method requires an argument, but is not used in the test itself. Dummy doesn’t perform actions, doesn’t store state, and doesn’t participate in logic - its task is one: to be in place where an object is required. This is the simplest and safest type of Test Double, allowing to explicitly show: “this parameter is not important here”.
For example, if a method requires Logger, but logging doesn’t play a role in the test, you can pass a dummy implementation:
class DummyLogger : Logger {
  override fun info(message: String) = Unit
  override fun error(message: String, throwable: Throwable?) = Unit
}

// Usage
val logger = DummyLogger()
val service = UserService(logger) // logger is not used here
val result = service.doSomething()
check(result == ExpectedResult)
In the example above,
DummyLoggerdoesn’t affect the result ofdoSomething()in any way. It’s passed only becauseUserServicerequiresLoggerin the constructor.
Dummy is useful where only the signature is important, not the meaning. It makes dependencies explicit, but without side effects or logic. This is a form of honest stub, we directly say: “this object doesn’t play a role, just let the test execute”.
Sometimes the choice of Double type seems technical: what’s easier to use, what’s faster to write. But actually it reflects the approach to architecture. If we use stub - we’re saying: this dependency is not important. If fake - we recognize that logic is important, but infrastructure is not. If mock - we want to control how exactly the system interacts. Spy - we want to know details, but not interfere with the process.
This is a choice: model behavior or structure. Check result or track path. Simplify environment or preserve its behavior. And when Double is chosen incorrectly - the test can be green, but meaningless.
Therefore, the question is not which Double to use, but what exactly we want to fix in this test.
6. Unit vs JUnit: What Really Stands Behind the Words
The word unit in programming means a unit of behavior - the minimal fragment of a system that can be tested in isolation. This can be a function, method, module, or class. The main thing is that it should be self-sufficient: that is, its behavior can be checked without running the entire system.
A test of such a fragment is called a unit test - it focuses not on the entire program, but on its smallest meaningful part, isolating external dependencies (through stub, mock, fake, etc.).
Unit = Unit (of behavior) , Unit Test = Check of this unit , JUnit = Java Unit Testing Framework
JUnit is a tool originally created to write and run unit tests on Java. The name is an abbreviation of Java + Unit. But over 20 years, JUnit has become not just a library, but a full-fledged testing platform that can be used for anything: from simple checks to integration and property-based tests.
To understand how to write good tests, it’s important to understand not only the code, but also the history: how JUnit evolved, and what ideas it brought.
JUnit History: From Procedures to DSL
JUnit 3 appeared in the early 2000s. This was a procedural framework built on conventions, not annotations or configurations. For a method to be considered a test, it had to start with test, and the class had to extend TestCase. Everything was inherited directly, no inversion, no meta-information.
public class UserServiceTest extends TestCase {
  public void testUserIsCreated() {
    UserService service = new UserService();
    User user = service.create("Alice");
    assertEquals("Alice", user.getName());
  }
}
No magic. JUnit searched for methods by name, started executing them, and signaled failures through AssertionFailedError or exceptions. Everything was held by conventions and strict order.
JUnit 4 became a turning point. It got rid of the need to inherit TestCase and moved to a declarative style based on annotations. A method was marked with @Test, and that was enough for the framework to understand it was dealing with a test.
class UserServiceTest {

  @Test
  fun userIsCreated() {
    val service = UserService()
    val user = service.create("Alice")
    assertEquals("Alice", user.name)
  }
}@Before, @After, @Ignore appeared, as well as the ability to write custom runners. But with all this, JUnit 4 remained procedural. Each test is essentially a regular function, just wrapped in infrastructure.
JUnit 5 is no longer a framework, but a platform. It’s divided into three parts: Platform, Jupiter, and Vintage.
JUnit Platform is the basic mechanism for discovering and running tests. It interacts with Gradle, Maven, IDE, and CI systems. Through it, tests are registered, executed, and reported. This is the integration layer, not logic. JUnit Jupiter is the modern API and test engine. It supports everything that appeared in JUnit 5: nested test classes (@Nested), customizable names (@DisplayName), parameterized and dynamic tests (@ParameterizedTest, @TestFactory). Jupiter makes tests declarative and expressive, bringing them closer to DSL. JUnit Vintage is an adapter. It allows running old tests written on JUnit 3 and 4 inside the new platform. Thanks to Vintage, projects can migrate gradually, without complete rewriting.
The syntax became expressive. Now tests can be built as behavior declarations, use parameters, introduce structures.
@ParameterizedTest
@ValueSource(strings = ["admin", "user", "guest"])
fun `roles should not be empty`(role: String) {
  val system = RoleService()
  val permissions = system.getPermissions(role)
  assertTrue(permissions.isNotEmpty())
}
JUnit 5 stopped being a “unit” framework in the narrow sense. It became a framework for any tests: units, integrations, property-based approach, contract checks. Everything that can be expressed as executable DSL with checks now fits inside.
JUnit not only adopted declarativeness, but also became part of architectural thinking. And now, saying @Test, we run not just a method - we initiate part of the test pipeline, where behavior is fixed as an artifact.
Why This Matters in CI
JUnit integrations in IDE, Gradle, Maven, Bazel, and CI systems (for example, GitHub Actions) expect a strictly defined structure: @Test methods are automatically indexed, isolated, and reported. Without this annotation, the method is just a function, inaccessible to the runner.
Getting to Know JUnit 5 Basics

If in JUnit 4 annotations were just flags, then in JUnit 5 they became formalized elements of the contract. Through them, the lifecycle, behavior, parameters, and integration points of tests are described. Below is the minimally necessary set of annotations to confidently navigate in Jupiter.
@Test This is the main entry point. Without it, the method is just a function. With it - a full-fledged test that JUnit will include in the lifecycle: call @BeforeEach, the test itself, @AfterEach, collect the result and display in the report.
A method with @Test should be public, without parameters, without return value (Unit), and not static (in Java) or companion (in Kotlin). If the test throws an exception - it’s considered failed. If not - it passed successfully.
@Test
fun `user is created`() {
  val service = UserService()
  val user = service.create("Alice")
  assertEquals("Alice", user.name)
}
JUnit calls this method as an autonomous unit - separately from others, in a new class instance (unless specified otherwise). This is part of the contract: the test should not depend on other tests and share state with them.
@BeforeEach / @AfterEach Called before and after each @Test. Used for environment setup and cleanup: creating files, resetting states, closing resources. Each test runs on a new class instance, so states between methods are not preserved.
@BeforeEach
fun setUp() {
  initDatabase()
}

@AfterEach
fun tearDown() {
  cleanupTempFiles()
}
@BeforeAll / @AfterAll Run once before and after all tests in the class. Used for heavy initialization (for example, raising embedded Redis, Kafka, Docker containers). In Kotlin, they require @TestInstance(PER_CLASS).
@TestInstance(TestInstance.Lifecycle.PER_CLASS)
@BeforeAll
fun initSuite() {
  EmbeddedRedis.start()
}
@TestInstance(...) Defines how JUnit creates test class instances.
By default, PER_METHOD is used, where a separate object is created for each method with @Test. This ensures isolation between tests, but doesn’t allow preserving common state between them.
If you specify PER_CLASS, then one object is created for the entire class. This allows using @BeforeAll and @AfterAll as regular methods (not in companion object), and also sharing state between tests.
@TestInstance(TestInstance.Lifecycle.PER_CLASS)
class ConfiguredTestLifecycle {

  private var counter = 0

  @BeforeAll
  fun initOnce() {
    counter = 10
  }

  @Test
  fun testA() {
    assert(counter >= 10)
  }

  @Test
  fun testB() {
    counter++ // state is preserved between tests
  }
}
This approach is used when initialization is heavy or state needs to be preserved between tests. But in most cases, PER_METHOD is safer.
@DisplayName Allows setting a readable test name. Displayed in IDE and CI, especially useful in parameterized or BDD-oriented tests. Works on both methods and classes.
@DisplayName("User with admin role gets all accesses")
@Test
fun adminGetsAllPermissions() {
  ...
}
@Disabled Skips the test. Used for temporary disabling (for example, unstable code, bug in dependency). In reports, it’s visible that the test is disabled.
@Disabled("Disabled until external API fix")
@Test
fun flakyIntegrationTest() {
  ...
}
@Nested Allows structuring tests in hierarchies with nested contexts. Applied only to inner class, otherwise the instance is not created. Convenient for Given/When/Then structures.
@Nested
inner class WhenUserIsGuest {
  @Test
  fun `should not access admin panel`() {
    ...
  }
}
@ParameterizedTest Runs the same method several times with different parameters. Requires specifying a data source through @ValueSource, @CsvSource, @EnumSource, @MethodSource, @ArgumentsSource Annotations for generating data in parameterized tests. @ValueSource for simple values. @CsvSource for tabular data. @MethodSource reference to a method returning Stream<Arguments>. @EnumSource passes enum values. @ArgumentsSource customizable data source.
@ParameterizedTest
@CsvSource("admin, true", "guest, false")
fun rolePermissionTest(role: String, allowed: Boolean) {
  assertEquals(allowed, checkAccess(role))
}
@RepeatedTest Runs the same test several times. Convenient for checking unstable scenarios: flakes, races, non-deterministic computations. The method can accept RepetitionInfo.
@RepeatedTest(3)
fun unstableTest() {
  assertTrue(runComputation().isSuccessful)
}
@Timeout Terminates the test with an error if it runs longer than the specified time. Applied to method and entire class. Useful for protection against hangs.
@Timeout(5)
@Test
fun longRunningProcessCompletes() {
  performHeavyOperation()
}
@Tag Adds arbitrary labels to tests. Used in CI/CD for filtering: you can run only tests with the needed tag (@Tag("slow"), @Tag("ci")).
@Tag("integration")
@Test
fun savesToDatabase() {
  saveToDb()
}
@ExtendWith(...) Connects extensions (Mockito, Spring, Testcontainers, custom hooks). Extension interfaces can inject dependencies, listen to events, manage environment.
@ExtendWith(SpringExtension::class)
class UserServiceSpringTest { ... }
@TestFactory Allows generating tests dynamically at runtime. The method should return Collection<DynamicTest> or Stream<DynamicTest>. Used when the number of cases is unknown (for example, from a JSON file).
@TestFactory
fun dynamicTestsFromFile(): List<DynamicTest> {
  return File("cases.txt").readLines().map { line ->
    dynamicTest("Case: $line") {
      check(line.isNotBlank())
    }
  }
}
The article won’t have a practical example of using annotations - for this there is official documentation: Junit 5 Documentation, which very thoroughly describes the capabilities and use of JUnit 5.
How JUnit 5 Runs Your @Test: From Command to Method
When you press “Run” in IDE or execute ./gradlew test, behind this simple action lies a complex multi-level architecture. Let’s trace the entire execution path of a test from a terminal command to calling your method marked with @Test.
Working Example for Demonstration
Let’s take something practical - an image downloader. The code is simple, but quite workable:
class ImageDownloader {
  fun downloadImage(url: String): ByteArray {
    val inputStream = URI(url).toURL().openStream()
    return inputStream.use { it.readAllBytes() }
  }
}
Next, a test for ImageDownloader using JUnit 5:
@TestInstance(TestInstance.Lifecycle.PER_METHOD)
@DisplayName("Image download and save to file")
class ImageDownloaderTest {

  private lateinit var tempFile: File
  private lateinit var outputStream: FileOutputStream

  private val imageUrl = "https://i.postimg.cc/26h8JBpH/QYbec-Thl-Qy7mcx-ZBYp-C0m-BDp16no-Mt-R5vwe-St-Wmv-large.jpg"

  @BeforeEach
  fun setUp() {
    tempFile = File("image-test.jpg")
    outputStream = FileOutputStream(tempFile, true)
  }

  @Test
  @DisplayName("Image should be downloaded and written to file")
  fun `downloaded image is saved to file`() {
    val downloader = ImageDownloader()
    val bytes = downloader.downloadImage(imageUrl)

    requireNotNull(bytes) { "Downloaded data should not be null" }

    outputStream.write(bytes)
    outputStream.flush()

    assertTrue(tempFile.length() > 0, "File after download should not be empty")
  }

  @AfterEach
  fun tearDown() {
    outputStream.close()
    tempFile.delete()
  }
}
The test is quite straightforward: there’s one method downloaded image is saved to file, which downloads an image and checks that the file was actually created and is not empty. In setUp we prepare a temporary file and stream, in tearDown we clean up everything. @DisplayName is needed for readable names in reports - instead of technical method names we’ll see meaningful descriptions.
Now let’s run the test through Gradle:
./gradlew :test --tests "test.ImageDownloaderTest"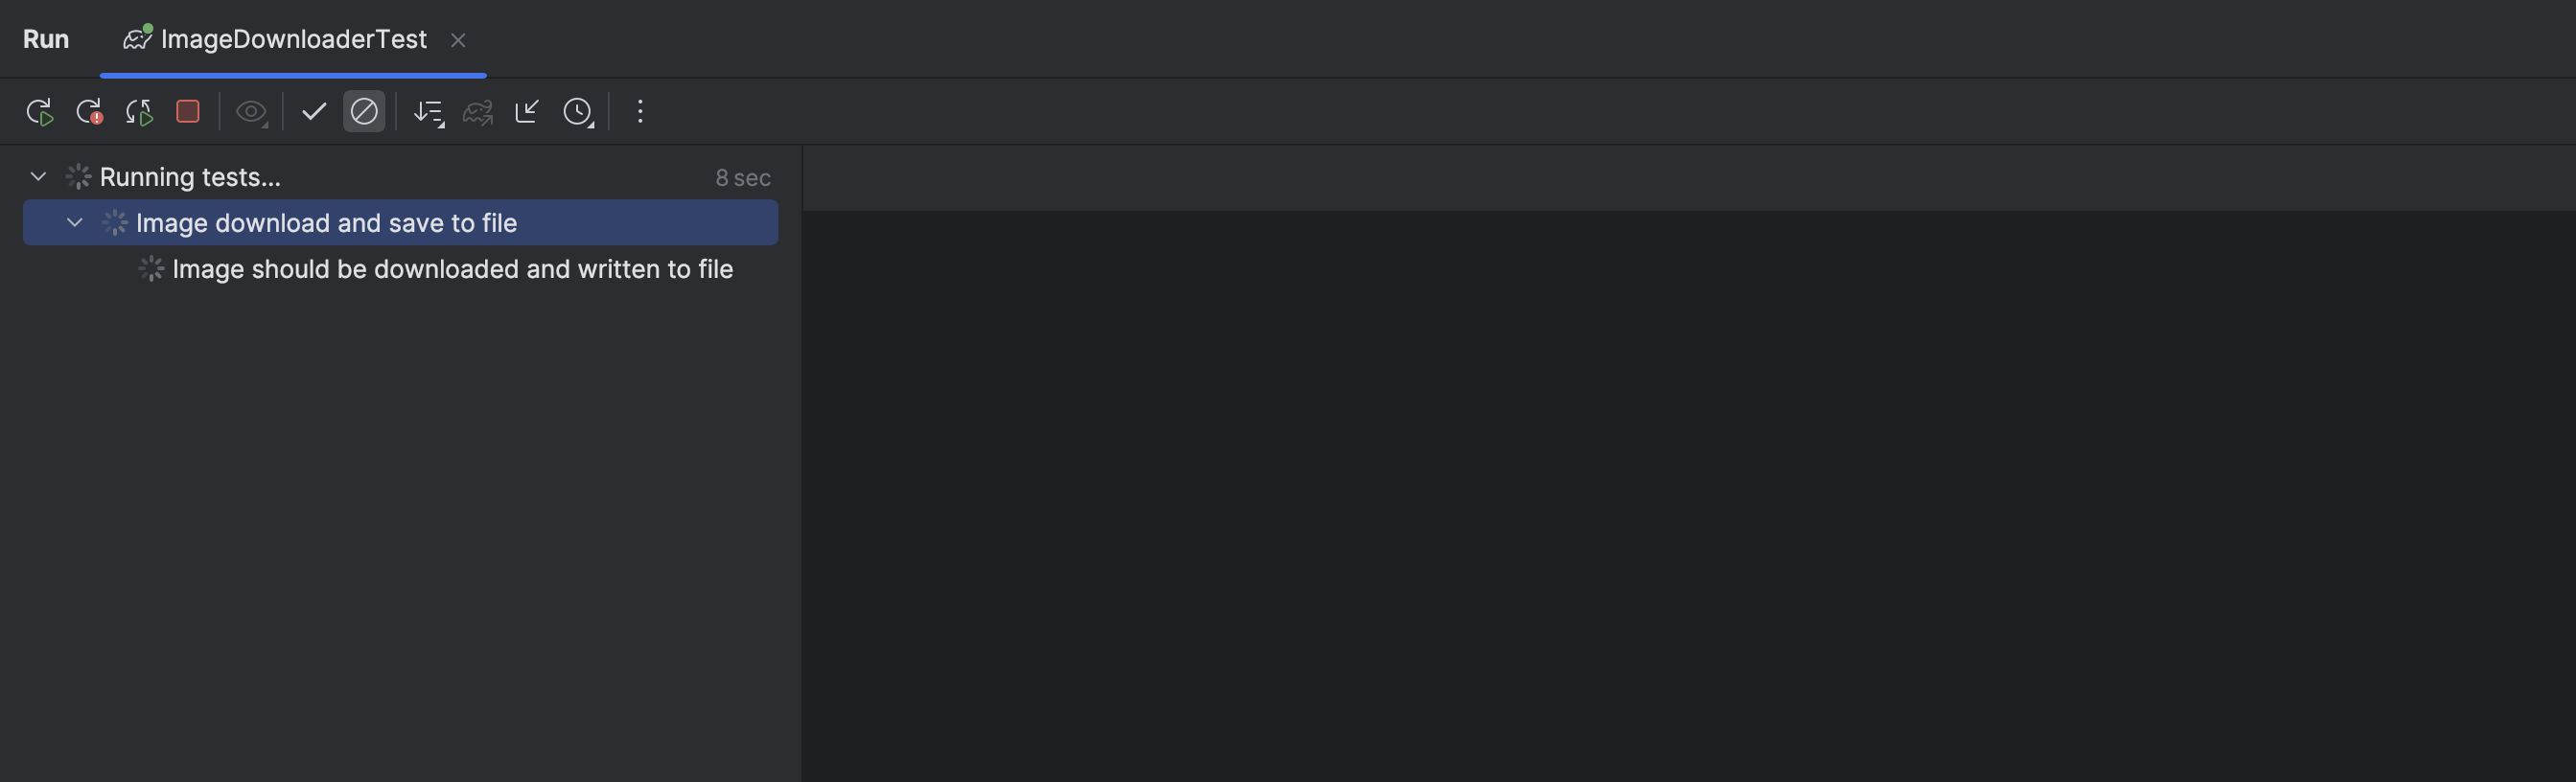
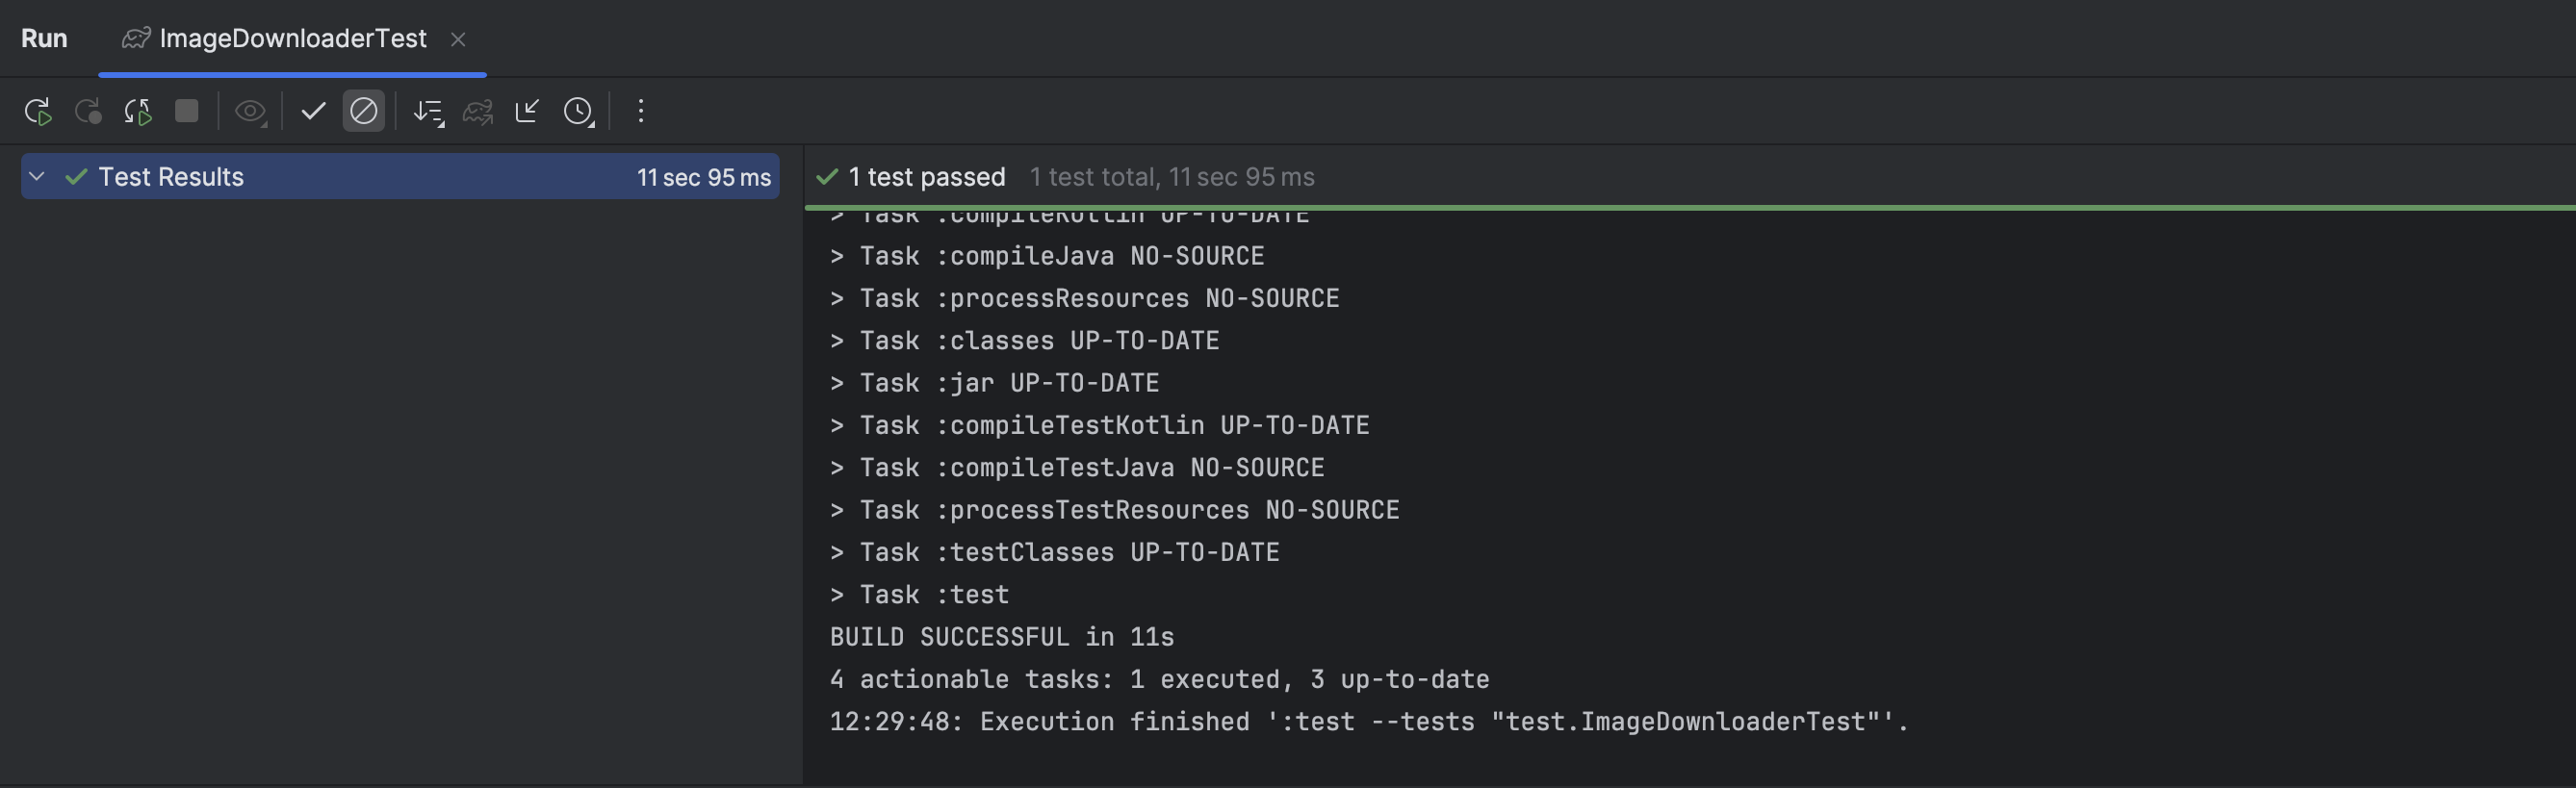
This command will work if the test task is configured in build.gradle:
tasks.test {
  useJUnitPlatform()
}
And here’s where it gets interesting - behind the scenes, an entire chain of calls is launched that goes through several architectural layers.
Stage 1: Gradle configures JUnit Platform
The useJUnitPlatform() call in Gradle is not just a configuration line. Under the hood, the following happens:
public void useJUnitPlatform() {
  useTestFramework(new JUnitPlatformTestFramework((DefaultTestFilter) getFilter(), true, getDryRun()));
}
Gradle creates an instance of JUnitPlatformTestFramework, which implements the TestFramework interface. This object becomes a bridge between Gradle and JUnit Platform - it knows how to find tests, how to run them, and how to get results.
Interesting fact: despite Kotlin gaining popularity, and our test being written in it, JUnit sources still remain true to the letter “J” in the name, meaning they’re in Java. The @Test annotation looks like this:
@Target({ElementType.ANNOTATION_TYPE, ElementType.METHOD})
@Retention(RetentionPolicy.RUNTIME)
@Documented
@API(status = STABLE, since = "5.0")
@Testable
public @interface Test {
}
The annotation documentation states: “@Test is used to mark a test method. Methods with @Test must not be private or static and must not return a value”. Simple rules, but behind them lies a well-thought-out architecture.
Stage 2: Creating test processor factory
When Gradle is ready to run tests, it asks our JUnitPlatformTestFramework for a processor factory:
public class JUnitPlatformTestFramework implements TestFramework {
  @Override
  public WorkerTestClassProcessorFactory getProcessorFactory() {
    return new JUnitPlatformTestClassProcessorFactory(new JUnitPlatformSpec(...));
  }
}
This factory knows how to create test class processors - objects that know how to process individual test classes. When the time comes, the factory creates a JUnitPlatformTestClassProcessor:
public class JUnitPlatformTestClassProcessorFactory implements WorkerTestClassProcessorFactory {
  @Override
  public WorkerTestClassProcessor create(...,JUnitPlatformSpec spec) {
    return new JUnitPlatformTestClassProcessor(spec, ...);
  }
}
JUnitPlatformTestClassProcessor inherits from AbstractJUnitTestClassProcessor and implements the TestClassProcessor interface. This is a key component - it will coordinate the execution of our tests.
Stage 3: TestWorker begins processing
Inside Gradle, there’s a TestWorker component that manages the lifecycle of test execution.
package org.gradle.api.internal.tasks.testing.worker;

public class TestWorker implements Action<WorkerProcessContext>, RemoteTestClassProcessor, Serializable, Stoppable {

  private TestClassProcessor processor;

  @Override
  public void processTestClass(final TestClassRunInfo testClass) {
        ...
    processor.processTestClass(testClass);
        ...
  }

  @Override
  public void startProcessing() {
        ...
    processor.startProcessing(resultProcessor);
  }
}
TestWorker calls two key processor methods:
public abstract class AbstractJUnitTestClassProcessor implements TestClassProcessor {

  private Action<String> executor;

  @Override
  public void startProcessing(TestResultProcessor resultProcessor) {
    TestResultProcessor resultProcessorChain = createResultProcessorChain(resultProcessor);
    resultProcessorActor = actorFactory.createBlockingActor(resultProcessorChain);
    executor = createTestExecutor(resultProcessorActor);
  }

  @Override
  public void processTestClass(TestClassRunInfo testClass) {
    LOGGER.debug("Executing test class {}", testClass.getTestClassName());
    executor.execute(testClass.getTestClassName());
  }
}
During the startProcessing stage, a chain of result handlers and an actor for thread-safe work with them are created. Actor is a pattern that guarantees that all operations with test results will be executed sequentially, even if tests are running in multiple threads.
The processTestClass method receives information about the test class and passes its name to the executor for execution. But here’s the catch - tests are not running yet!
Stage 4: Accumulating classes before execution
JUnitPlatformTestClassProcessor uses an interesting strategy - first collect all test classes, then run them all at once:
public class JUnitPlatformTestClassProcessor extends AbstractJUnitTestClassProcessor {

  @Override
  protected Action<String> createTestExecutor(Actor resultProcessorActor) {
    TestResultProcessor threadSafeResultProcessor = resultProcessorActor.getProxy(TestResultProcessor.class);
    launcherSession = BackwardsCompatibleLauncherSession.open();
    junitClassLoader = Thread.currentThread().getContextClassLoader();
    testClassExecutor = new CollectAllTestClassesExecutor(threadSafeResultProcessor);
    return testClassExecutor;
  }

  @Override
  public void stop() {
    testClassExecutor.processAllTestClasses();
    launcherSession.close();
    super.stop();
  }
}
CollectAllTestClassesExecutor is an inner class that simply accumulates test class names:
private class CollectAllTestClassesExecutor implements Action<String> {
  private final List<Class<?>> testClasses = new ArrayList<>();

  @Override
  public void execute(@Nonnull String testClassName) {
    Class<?> klass = loadClass(testClassName);
    testClasses.add(klass);
  }

  void processAllTestClasses() {
    LauncherDiscoveryRequest discoveryRequest = createLauncherDiscoveryRequest(testClasses);
    TestExecutionListener executionListener = new JUnitPlatformTestExecutionListener(...);
    Launcher launcher = launcherSession.getLauncher();
    launcher.execute(discoveryRequest, executionListener);
  }
}
This approach allows JUnit Platform to get a complete picture of all tests before starting execution. This is important for execution planning, thread distribution, and creating the correct report structure.
The actual execution happens only when Gradle calls stop() on the processor, which leads to calling processAllTestClasses().
Stage 5: Launcher takes control
When all classes are collected, a LauncherDiscoveryRequest object is created that describes which tests need to be found and executed. Then a Launcher instance is obtained from the session and execution is started:
Launcher launcher = launcherSession.getLauncher();
launcher.

execute(discoveryRequest, executionListener);
Launcher is the central entry point into JUnit Platform. Its implementation DefaultLauncher looks quite simple:
public class DefaultLauncher implements Launcher {

  private final EngineExecutionOrchestrator executionOrchestrator = new EngineExecutionOrchestrator(...);

  @Override
  public void execute(TestPlan testPlan, TestExecutionListener... listeners) {
    execute((InternalTestPlan) testPlan, listeners);
  }

  private void execute(InternalTestPlan internalTestPlan, TestExecutionListener[] listeners) {
    executionOrchestrator.execute(internalTestPlan, listeners);
  }
}
The main work is delegated to EngineExecutionOrchestrator - the test engine execution orchestrator.
Stage 6: Orchestrator launches test engines
JUnit Platform is built on a modular principle - different types of tests can be executed by different engines. For JUnit 5, this is JupiterTestEngine, for JUnit 4 - VintageTestEngine, there are engines for TestNG and other frameworks.
public class EngineExecutionOrchestrator {

  public void execute(LauncherDiscoveryResult discoveryResult, EngineExecutionListener engineExecutionListener) {
    for (TestEngine testEngine : discoveryResult.getTestEngines()) {
      TestDescriptor engineDescriptor = discoveryResult.getEngineTestDescriptor(testEngine);
      testEngine.execute(new ExecutionRequest(engineDescriptor, delayingListener, configurationParameters));
    }
  }
}
For each found engine, an ExecutionRequest is created with a description of tests that this engine should execute, and execute() is called.
In our case, JupiterTestEngine will be used - the engine for JUnit Jupiter (the official name of JUnit 5).
Stage 7: JupiterTestEngine organizes hierarchical execution
JupiterTestEngine inherits from HierarchicalTestEngine - a base class for engines that work with hierarchical test structures:
public final class JupiterTestEngine extends HierarchicalTestEngine<JupiterEngineExecutionContext> {

  @Override
  public void execute(ExecutionRequest request) {
    try (HierarchicalTestExecutorService executorService = createExecutorService(request)) {
      JupiterEngineExecutionContext executionContext = createExecutionContext(request);
      ThrowableCollector.Factory throwableCollectorFactory = createThrowableCollectorFactory(request);

      new HierarchicalTestExecutor<>(
        request,
        executionContext,
        executorService,
        throwableCollectorFactory
      ).execute().get();
    } catch (Exception exception) {
      throw new JUnitException("Error executing tests for engine " + getId(), exception);
    }
  }
}
Here, a HierarchicalTestExecutor is created - an executor that knows how to work with a tree of TestDescriptors. Each TestDescriptor represents a node in the test hierarchy - this can be an engine, package, class, method, or individual test case.
ExecutorService determines how tests will be executed - sequentially in one thread or in parallel in multiple threads.ThrowableCollector is needed for correct exception handling at different hierarchy levels.
Stage 8: HierarchicalTestExecutor launches root task
class HierarchicalTestExecutor<C extends EngineExecutionContext> {

  Future<Void> execute() {
    NodeTestTask<C> rootTestTask = new NodeTestTask<>(taskContext, rootTestDescriptor);
    rootTestTask.setParentContext(this.rootContext);
    return this.executorService.submit(rootTestTask);
  }
}
A root task NodeTestTask is created for the root TestDescriptor and submitted for execution to the ExecutorService. Often SameThreadHierarchicalTestExecutorService is used, which executes tasks synchronously:
public class SameThreadHierarchicalTestExecutorService implements HierarchicalTestExecutorService {

  @Override
  public Future<Void> submit(TestTask testTask) {
    testTask.execute();
    return CompletableFuture.completedFuture(null);
  }
}
In our example, SameThreadHierarchicalTestExecutorService is used - an executor that executes all NodeTestTasks sequentially in one thread. This behavior can be observed when running a single test class, especially from IDE or through --tests in Gradle. But it’s important to understand: the choice of specific HierarchicalTestExecutorService implementation is not made by the developer, but by JUnit Platform itself, based on configuration and the scale of the test plan. If the platform detects that there are many tests, or parallelization is enabled (junit.jupiter.execution.parallel.enabled=true), or execution is happening as part of the entire project, it may substitute ForkJoinPoolHierarchicalTestExecutorService. In this case, NodeTestTasks are parallelized using ForkJoinPool, which speeds up execution but requires special attention to thread safety and correct state management in @BeforeEach, @AfterEach, and other lifecycle phases. In fact, we don’t choose which thread the test will execute in - this is done by the engine, based on the test plan and environment. Therefore, you cannot rely on order or isolation if you don’t explicitly control the execution environment.
Stage 9: NodeTestTask performs recursive node processing
NodeTestTask is a wrapper around the logic of executing one TestDescriptor in the test hierarchy. Each such node can represent an engine, container, class, method, or even a dynamic test. Node execution is organized through the executeRecursively() method:
public class NodeTestTask<C extends EngineExecutionContext> implements TestTask {

  @Override
  public void execute() {
    executeRecursively();
  }

  private void executeRecursively() {
    throwableCollector.execute(() -> {
      node.around(context, ctx -> {
        context = node.before(context);
        context = node.execute(context, dynamicTestExecutor);
        taskContext.getExecutorService().invokeAll(children);
        dynamicTestExecutor.awaitFinished();
        node.after(context);
      });
    });
  }
}
The executeRecursively() method implements the canonical test execution lifecycle:
- before - environment preparation, execution of
@BeforeAlland@BeforeEach, creation of test class instance - execute - direct execution of node logic (for example, calling a method with
@Test) - children - recursive execution of all child nodes
- dynamic - waiting for completion of dynamically registered tests (via
@TestFactory) - after - finishing actions, execution of
@AfterEachand@AfterAll
The key line here is context = node.execute(context, dynamicTestExecutor). The call is delegated to the current TestDescriptor, whose implementation determines what exactly will be executed.
In the case of a regular test method, this node will be represented by an instance of TestMethodTestDescriptor, which means execution will go to its execute() method:
@Override
public JupiterEngineExecutionContext execute(JupiterEngineExecutionContext context,
                                             DynamicTestExecutor dynamicTestExecutor) {
  ThrowableCollector throwableCollector = context.getThrowableCollector();

  invokeBeforeEachCallbacks(context);
  if (throwableCollector.isEmpty()) {
    invokeBeforeEachMethods(context);
    if (throwableCollector.isEmpty()) {
      invokeBeforeTestExecutionCallbacks(context);
      if (throwableCollector.isEmpty()) {
        invokeTestMethod(context, dynamicTestExecutor);
      }
      invokeAfterTestExecutionCallbacks(context);
    }
    invokeAfterEachMethods(context);
  }
  invokeAfterEachCallbacks(context);

  return context;
}
Thus, calling node.execute(...) actually initiates the execution of an entire scenario: from calling @BeforeEach and @BeforeTestExecution, to the actual @Test method (inside invokeTestMethod(...)) and subsequent completion through @AfterEach.
This means that TestMethodTestDescriptor internally doesn’t simply call Method.invoke(...), but carefully wraps it in extension points where extensions, interceptions, and custom logic can be plugged in. That’s exactly why @Test is not just a method call, but a managed, phased process with intervention points at each stage.
Stage 10: Executing the specific test method
When the queue reaches a node of type MethodTestDescriptor (this is our method downloaded image is saved to file), its execute()method is called:
@Override
public JupiterEngineExecutionContext execute(JupiterEngineExecutionContext context, DynamicTestExecutor dynamicTestExecutor) {
  invoker.invoke(context.getExtensionRegistry(), context.getTestInstance(), executable);
  return context;
}
Here invoker is an instance of ExecutableInvoker, and executable is an object of type Method that references our test method.
ExecutableInvoker processes method parameters (if any), applies extensions, and eventually calls:
public class ExecutableInvoker {

  public Object invoke(ExtensionRegistry extensionRegistry, Object target, Executable executable, Object... arguments) throws Throwable {
        ...
    return ReflectionUtils.invokeMethod((Method) executable, target, arguments);
  }
}
And ReflectionUtils.invokeMethod() does what the name suggests:
public final class ReflectionUtils {

  public static Object invokeMethod(Method method, Object target, Object... arguments) throws Exception {
    method.setAccessible(true);
    return method.invoke(target, arguments);
  }
}
And here, finally, what all this machinery was started for happens - Method.invoke() is executed on an instance of our ImageDownloaderTest class, calling the downloaded image is saved to file() method.
Stage 11: Handling dynamic tests
JUnit 5 supports dynamic tests - tests that are created during runtime through @TestFactory. If our class had such a method:
@TestFactory
fun dynamicTests(): Stream<DynamicTest> {
  return Stream.of(
    DynamicTest.dynamicTest("Test 1") { /* test 1 logic */ },
    DynamicTest.dynamicTest("Test 2") { /* test 2 logic */ }
  )
}
Then these tests would be registered through DynamicTestExecutor:
public interface DynamicTestExecutor {
  void execute(TestDescriptor dynamicTestDescriptor);

  void awaitFinished();
}
During factory method execution, dynamic tests are registered through execute(), and their actual execution happens when calling awaitFinished() in NodeTestTask. This allows maintaining proper execution order and correctly handling results of dynamic tests.
How does JUnit know it’s dealing with a test?
In the previous chapter, we stopped at the moment when the @Test method is already executing. But how does JUnit even know that this method is a test? And where does it get the class from in the first place?
Actually, everything starts much earlier - at the moment when Gradle launches the worker process, where our test class will subsequently be discovered.
Let’s understand how Gradle sets up the environment, and what steps lead to launching the test Runnable from the user TestWorker. Everything that’s not critical - we’ll send to ellipsis.
GradleWorkerMain - entry point into the child worker process of Gradle
public class GradleWorkerMain {

  public void run() throws Exception {
    Class<? extends Callable<Void>> workerClass = (Class<? extends Callable<Void>>) implementationClassLoader.loadClass("org.gradle.process.internal.worker.child.SystemApplicationClassLoaderWorker").asSubclass(Callable.class);
    Callable<Void> main = workerClass.getConstructor(DataInputStream.class).newInstance(instr);
    main.call();
  }

  public static void main(String[] args) {
    new GradleWorkerMain().run();
    System.exit(0);
  }
}
Here a worker class is formed, through which everything is launched. So far everything looks like regular Java bootstrap - but then specific Gradle initialization begins. Comment:
GradleWorkerMainis the main entry point for any external Gradle worker process. It’s isolated from the main Gradle daemon and runs in a separate JVM process. Its task is to create the neededCallableby loading it throughimplementationClassLoader, and launch it. This is Gradle’s infrastructure mechanism for executing isolated tasks (compilation, tests, annotations, etc.).
SystemApplicationClassLoaderWorker - adapter that launches working logic in Gradle Worker API context
public class SystemApplicationClassLoaderWorker implements Callable<Void> {

  @Override
  public Void call() throws Exception {
        ...
    ActionExecutionWorker worker = new ActionExecutionWorker(config.getWorkerAction());
    worker.execute(new ContextImpl(...));
        ...
  }
}
Here we first encounter
config.getWorkerAction()- it contains exactly theTestWorkerthat’s responsible for launching tests. But for now it’s wrapped in a universalActionExecutionWorker. Comment:SystemApplicationClassLoaderWorkeris an internal Gradle launch adapter that wraps and executes the real workload. It’s used for switching ClassLoader context (SystemApplicationClassLoader) and passing control toActionExecutionWorker. It’s in this class that worker configuration (config) deployment happens and control is passed to the real task.
ActionExecutionWorker - calling the real TestWorker
public class ActionExecutionWorker implements Action<WorkerProcessContext> {
  private final Action<? super WorkerProcessContext> action;

  public ActionExecutionWorker(Action<? super WorkerProcessContext> action) {
    this.action = action;
  }

  @Override
  public void execute(final WorkerProcessContext workerContext) {
    ObjectConnection clientConnection = workerContext.getServerConnection();
    clientConnection.addUnrecoverableErrorHandler(new Action<Throwable>() {
      @Override
      public void execute(Throwable throwable) {
        if (action instanceof Stoppable) {
          ((Stoppable) action).stop();
        }
      }
    });

    ClassLoader contextClassLoader = Thread.currentThread().getContextClassLoader();
    Thread.currentThread().setContextClassLoader(action.getClass().getClassLoader());
    try {
      action.execute(workerContext); // <-- key moment: calls TestWorker
    } finally {
            ...
    }
  }
}
Here action is exactly TestWorker, just disguised as Action. This call leads to launching code that actually manages the test lifecycle. Comment:
ActionExecutionWorkeris a universal wrapper that launches userAction(in our case -TestWorker). It also adds a critical error handler (addUnrecoverableErrorHandler) that will executestop()onTestWorkerin case of failure. This is an infrastructure component of Gradle Worker API, ensuring safe task execution.
TestWorker - lifecycle management and test launching
public class TestWorker implements Action<WorkerProcessContext>, RemoteTestClassProcessor, Serializable, Stoppable {

  @Override
  public void execute(final WorkerProcessContext workerProcessContext) {
        ...
    CloseableServiceRegistry testServices = TestFrameworkServiceRegistry.create(workerProcessContext);
    startReceivingTests(workerProcessContext, testServices);

    try {
      while (state != State.STOPPED) {
        executeAndMaintainThreadName(runQueue.take());
      }
    } finally {
            ...
      testServices.close();
    }
  }

  private static void executeAndMaintainThreadName(Runnable action) {
    try {
      action.run();
    } finally {
      Thread.currentThread().setName(WORK_THREAD_NAME);
    }
  }

  @Override
  public void stop() {
    submitToRun(new Runnable() {
      @Override
      public void run() {
        try {
          processor.stop();
        } finally {
          state = State.STOPPED;
          // Clean the interrupted status
          // because some test class processors do work here, e.g. JUnitPlatform
          Thread.interrupted();
        }
      }
    });
  }

}
Here the real life of tests begins. The
startReceivingTests()method initiates receiving tests from the Master process, andrunQueue.take()pulls out the nextRunnable- including JUnit-like calls. But who decides which classes to put in this queue? executeAndMaintainThreadName, by calling action.run(), will actually call stop on TestWorker. Comment:TestWorkeris the main test management point on the worker process side. It listens to the task queue (runQueue) and executes them. This is exactly where Master sends commands throughRemoteTestClassProcessor → Dispatch → MethodInvocation. Also implementsStoppable- to correctly terminate the test process on external command (including during build cancellation).
Great, now we’ve moved to the next important layer - the delivery and invocation mechanism for tests. At this stage, TestWorker is already ready to receive commands, but who initiates test calls and how do classes with @Test actually get into execution?
Let’s break down the chain where Dispatch, MethodInvocation, and TestClassProcessor play a key role in how a test class is first * *discovered** and then **passed** for processing.
At this stage we’re slightly above JUnit Platform, at the Gradle Test Framework level. Here through proxy and dispatcher, method calls happen that ultimately pass control to JUnit Engine.
ProxyDispatchAdapter - creating a proxy that delegates calls through Dispatch
public class ProxyDispatchAdapter<T> {
  private final Class<T> type;
  private final T source;

  public ProxyDispatchAdapter(Dispatch<? super MethodInvocation> dispatch, Class<T> type, Class<?>... extraTypes) {
    this.type = type;
    List<Class<?>> types = new ArrayList<Class<?>>();
    ClassLoader classLoader = type.getClassLoader();
    types.add(type);
    for (Class<?> extraType : extraTypes) {
            ...
      types.add(extraType);
    }
    source = type.cast(Proxy.newProxyInstance(
      classLoader,
      types.toArray(new Class<?>[0]),
      new DispatchingInvocationHandler(type, dispatch)));
  }

  public T getSource() {
    return source;
  }

  private static class DispatchingInvocationHandler implements InvocationHandler {
    private final Class<?> type;
    private final Dispatch<? super MethodInvocation> dispatch;

    @Override
    public Object invoke(Object target, Method method, Object[] parameters) throws Throwable {
      dispatch.dispatch(new MethodInvocation(method, parameters));
      return null;
    }
  }
}
Here a dynamic proxy is created (through
java.lang.reflect.Proxy) that instead of directly calling the method, passes it asMethodInvocationtoDispatch. This is a key layer for remote and deferred calling ofprocessTestClass(...). Comment: used in the master process. Returns an implementation of theTestClassProcessorinterface, but in reality the method will be turned intoMethodInvocationand passed toDispatch, which will send it to the child process.
ContextClassLoaderDispatch - temporarily changes classloader to the test one
public class ContextClassLoaderDispatch<T> implements Dispatch<T> {
  private final Dispatch<? super T> dispatch;
  private final ClassLoader contextClassLoader;

  @Override
  public void dispatch(T message) {
    ClassLoader original = Thread.currentThread().getContextClassLoader();
    Thread.currentThread().setContextClassLoader(contextClassLoader);
    try {
      dispatch.dispatch(message);
    } finally {
      Thread.currentThread().setContextClassLoader(original);
    }
  }
}
Wraps
Dispatchso that each call happens in the needed contextClassLoader - the one where user tests,@Testannotations and other build artifacts are available. Otherwise reflection simply won’t see the needed classes. Comment: used on the worker side so that inside JUnit code the correctClassLoaderis applied, seeing test classes, their dependencies and runtime environment.
ReflectionDispatch - final handler that calls the method
public class ReflectionDispatch implements Dispatch<MethodInvocation> {
  private final Object target;

  @Override
  public void dispatch(MethodInvocation message) {
    try {
      Method method = message.getMethod();
      method.setAccessible(true);
      method.invoke(target, message.getArguments());
    } catch (InvocationTargetException e) {
      throw UncheckedException.throwAsUncheckedException(e.getCause());
    } catch (Throwable throwable) {
      throw UncheckedException.throwAsUncheckedException(throwable);
    }
  }
}
This is the last step of the call chain:
MethodInvocationarrives, and the method is called on thetargetobject. Usually this is exactlyJUnitTestClassProcessor, on whichprocessTestClass(...)is called. Comment: works insideTestWorker- receives a call from the master process, extracts method and arguments, and calls the needed method onTestClassProcessor, actually starting test execution.
SuiteTestClassProcessor - wrapper over real class processing
public class SuiteTestClassProcessor implements TestClassProcessor {
  private final TestClassProcessor processor;

  @Override
  public void processTestClass(TestClassRunInfo testClass) {
        ...
    processor.processTestClass(testClass);
        ...
  }
}
It’s exactly here that
processTestClass(...)is called on the real processor - most often this isJUnitTestClassProcessor, and it already initializes JUnit Engine, Discovery, and starts scanning@Testannotations. Comment:SuiteTestClassProcessoradds a fault-tolerance wrapper over the realTestClassProcessor. It catches execution exceptions and reports them throughresultProcessorto ensure correct reporting even if tests failed at the startup phase.
AbstractJUnitTestClassProcessor - common logic for JUnit processors
public abstract class AbstractJUnitTestClassProcessor implements TestClassProcessor {

  private Action<String> executor;

  @Override
  public void startProcessing(TestResultProcessor resultProcessor) {
    executor = createTestExecutor(resultProcessorActor);
  }

  @Override
  public void processTestClass(TestClassRunInfo testClass) {
    executor.execute(testClass.getTestClassName());
  }
}
Next, the
executorvariable is assigned the result of thecreateTestExecutor(...)function, and in theprocessTestClass(...)method there’s a call to thisexecutor. Comment:AbstractJUnitTestClassProcessorcontains a template implementation ofprocessTestClass(...), delegating execution toAction<String>- this is the actual test execution mechanism. Concrete implementations define how exactly to run the class.
JUnitPlatformTestClassProcessor - implementation for JUnit 5
public class JUnitPlatformTestClassProcessor extends AbstractJUnitTestClassProcessor {

  @Override
  protected Action<String> createTestExecutor(Actor resultProcessorActor) {
        ...
    testClassExecutor = new CollectAllTestClassesExecutor(threadSafeResultProcessor);
    return testClassExecutor;
  }
}
JUnitPlatformTestClassProcessorinherits fromAbstractJUnitTestClassProcessorand provides implementation of thecreateTestExecutor(...)method. Comment: during the startup phase (instartProcessing) aCollectAllTestClassesExecutoris created, which temporarily accumulates all classes marked for execution. Later Gradle will callstopProcessing(), and then the accumulated classes will be passed toJUnitPlatformthroughLauncher.execute(...).
CollectAllTestClassesExecutor - accumulating test classes until execution moment
private class CollectAllTestClassesExecutor implements Action<String> {
  private final List<Class<?>> testClasses = new ArrayList<>();

  @Override
  public void execute(@Nonnull String testClassName) {
    Class<?> klass = loadClass(testClassName);
    testClasses.add(klass);
  }
}
Here
klassis added to thetestClasseslist. Comment:CollectAllTestClassesExecutordoesn’t run tests immediately. It simply accumulates them for later batch execution. Later, in thestopProcessing()method, the list will be passed toJUnit Launcherto test all classes with a unifiedTestPlan.
Why did we consider all this?
If you’ve read this far, you’ve probably asked yourself at least once: why bother diving into JUnit 5 architecture at all? Why know what TestWorker does, how TestEngine differs from API, and how Gradle interacts with JUnit Platform?
The answer lies in JUnit’s very nature. This isn’t just one of the testing frameworks. This is infrastructure that JVM development has relied on for decades. JUnit isn’t just a library. It’s a canonical example of how frameworks with deep integration are built: in Gradle, in IDEs, in CI. By understanding how JUnit works, you’ll understand how almost all testing tools in the JVM world are structured - from Spock to Kotest, from TestNG to Spek.
Annotation-based tests always work through reflection. There’s always a runtime that analyzes classes, identifies methods, wraps them in execution structure. There’s always a TestEngine that decides how exactly to call @BeforeEach, what counts as failed-state, and how to interrupt hierarchy when parent fails. It’s precisely the Engine - not @Test and not Assertions - that determines behavior.
JUnit Platform separated Engine from API. This was a strategic move. Now JUnit isn’t a library with annotations. It’s an infrastructural protocol that any engines can connect to. Jupiter is one of them. Kotest is another. Even your own.
We’ve walked the entire path: from the ./gradlew test command to the actual call of your method. Along the way there were:
- Gradle, which coordinates the process;
- Forked Worker, launching process with isolation;
- TestClassProcessor, creating execution structure;
- JUnit Platform, connecting the world of engines and infrastructure;
- JUnit Jupiter, implementing JUnit 5 rules;
- Hierarchical Test Executor, processing before/execute/after as a tree;
- and finally, the concrete method called through reflection.
This looks more complex than assertEquals(4, 2 + 2), but this complexity is meaningful. It ensures modularity, extensibility, flexibility and parallelism. It allows using your own engines, your own lifecycles, your own rules. And it’s precisely this knowledge that distinguishes a framework user from an engineer.
@VisibleForTesting: access extended exclusively for tests
It’s worth mentioning the @VisibleForTesting annotation - an infrequent but important participant in the testing landscape. It doesn’t make a method a test, doesn’t participate in runtime and doesn’t affect execution in any way. But if you see it in code, it means somewhere an honest deal occurred between encapsulation and testability. A compromise. Clearly marked.
The annotation signals: this method, this field or constructor is opened wider than it should be - but not because “it’s easier this way”, but because the test requires it. You can’t test private logic directly, and you don’t want to expose it in the API. Then the developer makes a careful boundary violation and leaves a @VisibleForTesting mark. It’s like a safe handle placed outside exclusively for maintenance engineers.
This approach is especially common in Android and Kotlin projects, where the internal or protected modifier often becomes a compromise zone. The method could be private, but then tests couldn’t call it. We expand visibility, but do it explicitly and documented:
@VisibleForTesting
internal fun recalculateChecksum() {
  // method is open not for production, but so test can call directly
}
The annotation doesn’t have a single source. Its first version appeared in Guava: com.google.common.annotations.VisibleForTesting. Then similar ones appeared in androidx.annotation and org.jetbrains.annotations with the same meaning, but slightly different implementation. For example, the Android version allows specifying what visibility should be used in production (otherwise = PRIVATE), in case you forget to return the modifier back.
Important to understand: the compiler doesn’t care. JUnit even less so. This isn’t an instruction, but an honest marker. A promise made to yourself and the team: “I know this is a hole in encapsulation and I made it not out of stupidity”. It’s precisely such details that distinguish an engineering solution from chaotic “as long as it works”.
Why JUnit 5 isn’t just about units anymore
When people say “JUnit 5”, they most often mean simply a modern library for writing unit tests. And it’s true - JUnit 5 can be used as a regular tool: connect it, write tests, run from IDE or Gradle.
But this is a superficial view. Because JUnit 5 isn’t just a library. It’s a framework from which you can assemble other frameworks. Inside it is JUnit Platform, a module that works as a runtime engine: it doesn’t dictate how tests should look, it knows how to discover, execute and aggregate any test units, if they’re implemented within the platform contract.
Many other libraries are already built on this contract today. They don’t use JUnit “as is”, they build their abstractions, their DSLs, but under the hood all this is still executed through JUnit Platform. Here are several bright examples:
Kotest A framework that radically rethinks how a test should look in Kotlin language. Instead of the familiar “class + methods” structure, here’s a declarative DSL, closer to documentation structure: “should do something” inside “describe this behavior”. Kotest also has built-in support for property-based testing, matcher DSL, test generators and deterministic retry strategies. But what’s important - all this works through JUnit Platform, which means it’s compatible with IDE, Gradle and CI out of the box.
Spek A minimalist framework oriented toward behavior specification, not implementation. Tests in Spek are written as chains of nested blocks given / on / it, approaching the form of technical specification. Unlike Kotest, Spek emphasizes purity and conciseness, especially in microservice scenarios. And again, underneath all this structure lies not its own runner, but precisely JUnit Platform.
Cucumber A BDD framework that’s built around Gherkin scenarios. You describe system behavior in .feature files in natural language, and link step implementation with code. To run these scenarios, Cucumber uses its adapter, which registers itself as TestEngine JUnit Platform. This allows running BDD tests in the same environment as regular unit or integration tests, without breaking the pipeline.
JQwik Property-based testing for Java and Kotlin, inspired by QuickCheck. Instead of writing concrete examples, you describe properties that the system should satisfy for arbitrary inputs. Data generation, shrinking, randomness - all built-in. And again: it doesn’t make its own ecosystem - it integrates through JUnit Platform.
JUnit 5 isn’t the peak of testing. It’s rather the soil on which different forms of testing grow: declarative, specification-based, BDD, property-based. And the ability to build on top of it isn’t a side effect, it’s the foundation of the architectural concept.
This isn’t a library for “write a test and forget”, it’s a platform to which you can connect your vision of what a test is in general.
7. Kotlin Test: Strict minimalism or Kotest
When a developer first encounters tests in Kotlin, especially on JVM, they almost automatically reach for what’s already familiar - JUnit. Perhaps not even suspecting that Kotlin’s standard library has its own testing module - kotlin.test. Not a library on GitHub, not another framework from enthusiasts, but part of the language itself. You don’t need to install it, it comes with the standard library, and is already available in any Kotlin project.

If you open any multiplatform library from JetBrains - for example, kotlinx.coroutines or kotlinx.datetime - you can see that all tests are written with kotlin.test: @Test, assertEquals, assertFailsWith. And all this without mentioning JUnit. This isn’t accidental. kotlin.test was conceived as a unified abstract layer for testing across all targets: JVM, JS, Native. It’s not tied to JUnit, Mocha or XCTest - but knows how to work with each of them, if you connect the corresponding adapter. On JVM this can be kotlin-test-junit, kotlin-test-junit5, kotlin-test-testng. On JavaScript - integration with Mocha. On Native - its own implementation, written on C interop. The API remains unified.
Under the hood, of course, there’s no magic: assertEquals delegates to org.junit.jupiter.api.Assertions.assertEquals only if you yourself connected kotlin-test-junit5. No JUnit - there will be NoClassDefFoundError. No backup plans. kotlin.test isn’t runtime infrastructure, but purely an API layer, same as kotlin.collections. Kotlin provides a common name, implementation depends on what platform you’re on and what you put in classpath.
That’s exactly why kotlin.test is often underestimated: on JVM it doesn’t seem independent, looks like a bridge, sometimes like a crutch. But behind this decision stands a different philosophy - not to extend JUnit, but to move away from it. Make testing API the same as standard functions in Kotlin: concise, predictable, platform-neutral. Kotlin doesn’t have its own @Synchronized, its own List or File, because there are JVM analogues. But it has kotlin.test.assertEquals and this isn’t just syntactic sugar.
Example of minimal test in the spirit of this philosophy:
@Test
fun testSum() {
  assertEquals(4, 2 + 2)
}
No @RunWith, no @DisplayName, no assertThat(...).isEqualTo(...). Just a function, just a check. As if you’re writing not a test, but regular code - and this is the key concept. Not to take testing into a separate world with rituals and annotations, but to integrate it into regular development practice, make it natural, like println().
But this strictness has its limit. At some point you want to group tests by context, write beforeEach, use property-based testing, assert not one value, but an entire structure. And here begins another story - the story of Kotest.
Kotest - the best Kotlin First testing library?
Kotest isn’t a wrapper over kotlin.test and not an alternative to JUnit in the classical sense. This is an attempt to rethink the very structure of tests, removing them from the world of frameworks and returning them to the language. Not to simulate JUnit DSL with Kotlin touches, but to write tests as code, not as declarations.
There’s no @Test in Kotest. Instead - structures and declarative constructs. Specifications (FunSpec, DescribeSpec, BehaviorSpec and others) set the test form: you don’t hang annotation on a method, you describe how the system behaves in a specific context. DSL does this without ceremony.
class MathSpec : FunSpec({
  test("2 + 2 should be 4") {
    2 + 2 shouldBe 4
  }
})
This isn’t just short. This reads like a specification. Kotest allows writing tests in a form close to documentation, but without losing precision or control over structure. You explicitly set context, expected behavior, boundaries. This isn’t a set of methods - it’s a tree.
Each style (Spec) has its own semantics. FunSpec - minimalism, DescribeSpec - BDD, ShouldSpec - behavioral description, WordSpec - text nesting, FreeSpec - arbitrary freedom, ExpectSpec - JUnit style. This isn’t cosmetics - these are different ways to think about tests.
Kotest works through TestEngine, which integrates with JUnit Platform. Without JUnit Platform it doesn’t run - and this is a fundamental point: Kotest doesn’t reject JUnit, it uses it as entry point, but completely replaces internal mechanics. This isn’t a crutch over JUnit 5, but an independent framework that uses JUnit only as bootstrap and channel for IDE and Gradle.
Each test can be suspend. Coroutine tests don’t require any wrappers or extensions. delay, Flow, runBlockingTest - everything works out of the box. This is especially important if you’re testing what’s already built on suspend-functions. In kotlin.test this is possible, but not equally smooth on all levels.
Matchers in Kotest are a separate topic. You don’t do assertEquals, you write value shouldBe expected. Or list shouldContainExactly listOf(...). Or exception shouldHaveMessage "Invalid state". This isn’t just syntax. This is a way to get rid of an extra abstraction layer: not write “assert X about Y”, but describe Y’s properties as they are.
There’s assertSoftly, which allows checking several properties at once in one test and see all errors at once, not just the first one. This is convenient when you’re testing a complex object and don’t want to write five separate tests for each field.
Kotest also supports property-based testing through forAll, checkAll, Gen. This is closer to QuickCheck than to JUnit. Tests become not a list of cases, but a hypothesis generator. In the world of a strictly typed language with a powerful compiler - this is a logical continuation.
class EmailValidatorTest : StringSpec({
  "should only accept valid emails" {
    forAll(Gen.email()) { email ->
      isValidEmail(email)
    }
  }
})
Kotest can be used on JS and Native, but not with the same depth. Its real power is in JVM. That’s where you get the full spectrum: DSL, coroutines, matchers, generators, specifications, soft-asserts, global configurations, hooks and extensions. This isn’t just a library, it’s an entire testing environment.
But there are boundaries too. Kotest is harder to start. It’s not as light as kotlin.test. Its IDE integration isn’t always seamless. Sometimes you need to understand how lifecycle is structured, especially if you write extensions or work with Before/After-hooks. Documentation covers much, but not everything. If you’re a Kotlin newcomer or just want to check that a function returns true - you probably don’t need all this DSL.
And here the choice arises. If you need to write simple tests quickly and platform-neutrally - kotlin.test will give everything needed. It’s strict, predictable and doesn’t require infrastructure. But if you want to describe system behavior in terms close to language, if expressiveness is important to you, nesting, property-based testing, flexible configuration and DSL written specifically for Kotlin - Kotest takes all this upon itself. Not by license. By design.
And does it better than anyone on JVM.
8. Conclusion: Tests as thinking, not as procedure
We’ve walked the path from assertEquals(expected, actual) to JUnit Platform architecture. From simple comparison of two values to understanding how the entire testing infrastructure works on JVM. This isn’t accidental. Testing starts with philosophy and ends with engineering.
If you remember only one thought from this article, let it be this: a test is not a check, but a model. When you write assertTrue(user.isActive()), you’re not checking whether the user is actually active in reality. You’re fixing an agreement that under given conditions the isActive property should return true. This is a contract between you and the system. And when a test fails - it’s not “truth” that’s violated, but precisely this contract.
Test Doubles - stub, mock, fake, spy - aren’t just technical techniques. They’re ways of building controlled worlds where you can check separate aspects of behavior in isolation. The choice between them reflects your approach to architecture: what’s important to control, what can be simplified, and what must be preserved in pristine form.
JUnit went through evolution from procedural framework to platform. Today JUnit 5 isn’t just a library for writing unit tests, it’s infrastructure on which other approaches to testing are built: from Kotest with its expressive DSL to Cucumber with BDD scenarios. Understanding this architecture gives the opportunity not only to use ready solutions, but to create your own.
Kotlin brings to testing the same philosophy as to main code: conciseness without losing expressiveness, strictness without excessive ceremony. kotlin.test gives platform-neutral minimum. Kotest - rich ecosystem for those who want to describe system behavior as specification, not as a set of procedures.
But the main thing isn’t in tool choice. The main thing is in understanding what you’re testing and why. Each @Test is a hypothesis about system behavior. Each assert is a boundary between acceptable and unacceptable. And the clearer these boundaries, the more reliable the system and the easier it is to develop.
In the next parts of the series we’ll dive deeper into practical aspects: how popular testing frameworks work, how testing infrastructure works under the hood, how to avoid stability illusions and build a test pyramid that actually works. But the foundation is already laid. Tests aren’t checking that code works. They’re a way to formalize how it should work. And if you understand this - you’re already on the right path.
Обсуждение
Пока нет комментариев. Будьте первым, кто поделится своими мыслями!